How to Encrypt your Password in Python using the Cryptography Package ?
In this blog we will be encrypting or converting our password into a code to prevent any unauthorized access. This is pretty valuable in today's world where one can't be totally sure of his/her data's security unless it is encrypted .
So we will using basic Python and a package called Cryptography which provides cryptographic recipes and primitives to Python developers. You may have heard of cryptography a lot as it is the underlying technology of the Blockchain and the Digital Currency revolution where the the transmission of data is made secure by encrypting and decrypting the data using Cryptography .
This will be very simple so without further ado let's get started:
Getting Ready
1. Python Installation
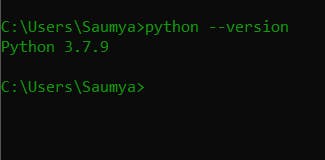
To check whether you have Python already installed open your terminal and type this :
python --version
If installed you will see something like this :

It should show you the version of the Python you are using without any errors and if that does not happen then you have to install it from here .
2. Pip Installation
Pip is a package installer for python that we will use to install the cryptography package .
To check whether you have pip already installed open your terminal and type this :
py -m pip --version
If installed you will see something like this :

Else to install 'pip' follow this process :
Go to this link : get-pip.py and download and save the code as
get-pip.py.Now open your terminal and navigate to the folder where this
get-pip.pyis saved and the type this command :python get-pip.py
Now you must see that pip is being installed !
3. Cryptography Installation
Now that you have checked that both Python and Pip have been installed let's install the main component that we are going to use - the Cryptography Package .
To do it open your terminal and type :
pip install cryptography
Now the installation should start and we are officially ready to build our first encrypter !! Great job now let's proceed !
Building the Encrypter
Now fire up your favorite IDE and let's get started writing the code. 🔥
1. Importing required library
Make a python file named anything of your choice, I have
named it encrypter.py .
Import the Cryptography Library :
from cryptography.fernet import Fernet
2. Generate the Key
So, cryptography needs authentication to word so we will
be authenticating it by generating a key which we will use
every time we ask it to encrypt something .
So to create the key we will write this `genewrite_key()`
function :
def genewrite_key():
    key= Fernet.generate_key()
    with open("pass.key","wb") as key_file:
        key_file.write(key)
So, what this function basically does is it :
- Generates a unique key.
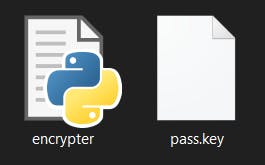
- Makes a new file named
pass.keyin the current folder . - And stores the pass/authentication key in that file .
After you run the program with python encrypter.py command the new pass.key file must be generated .

3. Getting the Key
Now let's write a get_key()function to make our life easier and just call it when we need the key .
def get_key():
    key= open("pass.key","rb").read()
    return key
4. Let's Encrypt !!
Now this piece of code does the encryption for us and prints the encrypted message :
genewrite_key()
msg=input("Enter the message you want to ENCRYPT : ")
text=msg.encode()
key= get_key()
a= Fernet(key)
encrypted_msg= a.encrypt(text)
print(encrypted_msg,)
Let me explain you what's happening in the above lines :
- First we call the
genewrite_key()function that creates thepass.keyfile for us . - Next we ask the user for the message or password that he wants to encrypt .
- Next we encode our String to a set of bytes by using
python's
.encode( )function which makes it ready to be encrypted. - Next we call the
get_key( )function to get the generated key and store it in thekeyvariable. - Then as I had mention that the key is required for the
authentication, so we pass the Key through they
Cryptography library's
Frenet( )function . - Then we will just call the
.encrypt( )function which will give us the encrypted and secure form of our string and to see that we print it later .
Let's Test it Now :

Now we can also decode it with the same key like this :
decoded_text = a.decrypt(encrypted_msg)
print(decoded_text)
